Registration page tab
The information in the Registration Page tab is only used if guest registration is enabled in the Guests tab.
Use the Registration Page options to design the Guest Registration form.
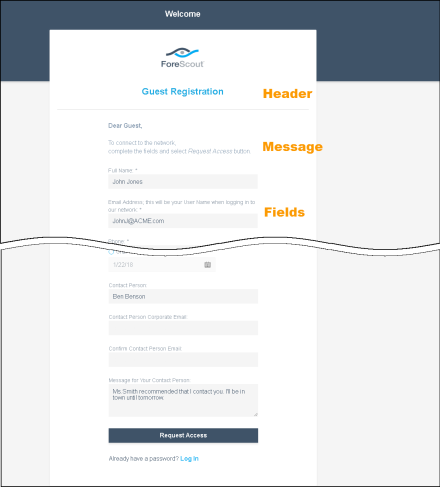
- Define the title and message that appears in the Guest Registration form.
- Define the form fields that you want guests to use.
- (Optional) Require guests to enter a registration code to begin the registration process.
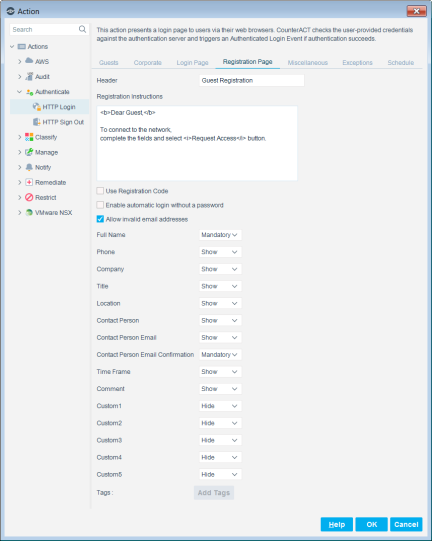
To design the Guest Registration form:
- In the Header field, define a Guest Registration form title.
- In the Registration Instructions text box, define the message to appear on the page.
- Select Use registration code to require guests to enter a registration code before beginning the registration process. This ensures that only guests with whom you've shared a registration code can apply for network access. These codes are automatically generated, but they must be shared with endpoint users manually.
- Select Enable automatic login without a password if you want to allow users to log in without a password. When this option is selected, there is no authentication.
- The Email field is always mandatory, and guests are identified by its contents.
- Clear the Allow invalid email addresses checkbox to ensure that this field contains a valid email address.
- In environments where users are identified by information other than their email address, select Allow invalid email addresses so that any value is accepted in the Email field. To ensure that only one guest identification field is displayed in the Guest Registration form, it is recommended to set the Full Name drop-down menu to Hide whenever Allow invalid email addresses is selected. For each field in the list, select one of the following:
- Hide: The field is not displayed in the registration form.
- Show: The field is displayed in the registration form and is optional.
- Mandatory: The field is displayed in the registration form, and the user must enter a value.
- If tags are defined in your environment, you can add tags to the registration form. The available fields include five custom fields that you can configure. For example, Custom1 might be renamed Building Name to indicate the name of the building where the guest will be located.
To assign custom names:
- Select from the Console menu, and then select .
- Enter “Custom” in the search field.
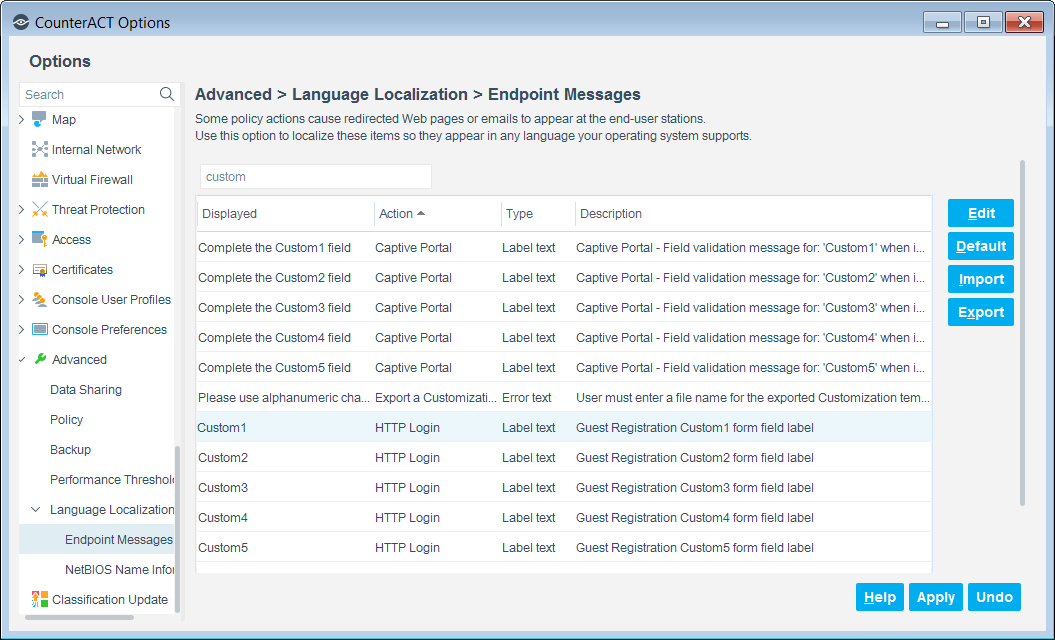
- Edit the fields as required, select Close, and then select Apply.
 minute read