About NIC Vendor DB Module
The NIC Vendor DB works with the HPS Inspection Engine to map NICs to their vendors based on their media access control (MAC) address. The NIC DB module provides host properties that let you detect and manage endpoints based on this information:
-
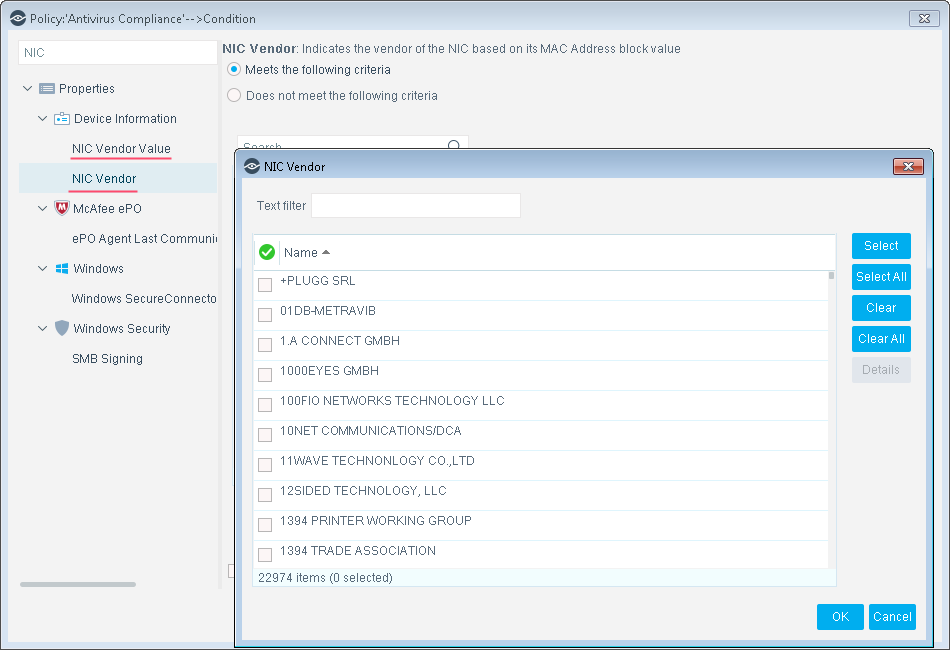
NIC vendor names are listed in the NIC Vendor host property.
-
Use the NIC Vendor Value property to match vendor names with a free-text filter.
NIC Vendor Names
Module Requirements
This module works with Forescout eyeSight v8.0.1 or above and requires the following Forescout components:
-
Endpoint Module, including the following components:
-
HPS Inspection Engine
-
Linux Plugin
-
OS X Plugin
-
NIC Vendors Detected by Forescout eyeSight
The NIC Vendor DB identifies NIC vendors by their MAC Address Block as defined by the Institute of Electrical and Electronics Engineers (IEEE) Standards Association.
This block of the MAC address was previously known as the Organizationally Unique Identifier (OUI). The NIC Vendor DB uses the following MAC Address Block repositories:
-
MAC Address Block Large (MA-L)
-
MAC Address Block Medium (MA-M)
-
MAC Address Block Small (MA-S)
-
Individual Address Block (IAB)
Each release of this module updates vendor information to reflect changes to these repositories maintained by the IEEE.
Detect Endpoints by NIC Vendor
The module provides the following host properties that can be used to build policy conditions based on the NIC controllers installed on endpoints.
NIC Vendor Properties
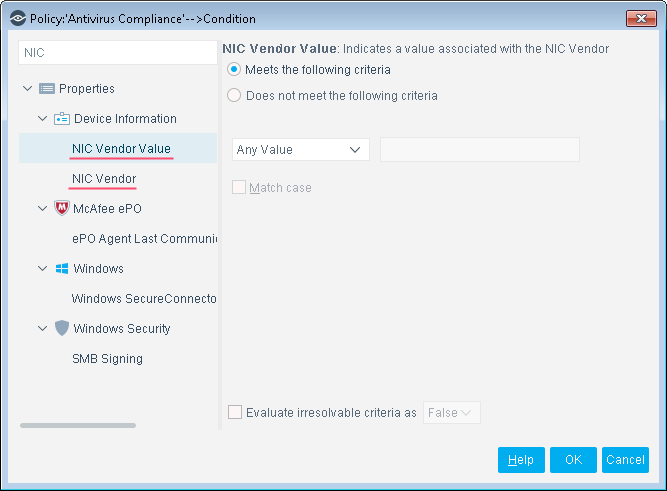
| NIC Vendor | Indicates the vendor of the NIC, based on its MAC Address Block value. To define a matching condition, select Add and then select one or more MAC Address Block values in the NIC Vendor dialog. To detect endpoints with locally administered MAC addresses, select the Locally Administered MAC Address option in the NIC Vendor dialog. This option matches MAC addresses whose Universal/Local bit is set to 1 (local). |
| NIC Vendor Value | Indicates NIC Vendor values in text format. Use text matching tools to create conditions that match several variants of a vendor name or look for a specific substring in a name. |
Install the NIC Vendor DB Module
To install the module:
- Navigate to the Downloads page on the Customer Support Portal.
-
Download the
.fpifile for the component. -
Save the file to the machine where the Console is installed.
-
Log into the Console and select from the menu.
-
Select Modules > Install. The Open dialog box opens.
- Browse to and select the saved component
.fpifile. -
Select Install. The Installation screen opens.
-
Select I agree to the License Agreement to confirm that you have read and agree to its terms, and then select Install. The installation cannot proceed unless you agree to the License Agreement.
The Installation begins immediately after selecting Install and cannot be interrupted or canceled.In modules that contain more than one component, the installation proceeds automatically one component at a time. -
When the installation completes, select Close to close the window. The installed component (module or plugin) is displayed in the Modules pane.
Some components are not automatically started following installation. -
Start the plugin. In Tools > Options > Modules, right-click on the component name in the Modules pane. In the menu that appears, click Start.
-
To confirm that your installed and configured component is running, in Tools > Options > Modules, hover over the component name in the Modules pane to view a tooltip indicating whether it is running on devices in your development.
 - The component is stopped on all eyeSight devices.
 - The component is stopped on some eyeSight devices.
 - The component is Running on all eyeSight devices.
 minute read