Workbench
Using the Workbench, you can track and manage your Risk Management Cases. Here, you can track and manage your Risk Management Cases. The widgets at the top of the Workbench view provide summary statistics covering Case Priority, Case Information, and your specific My Case Overview.
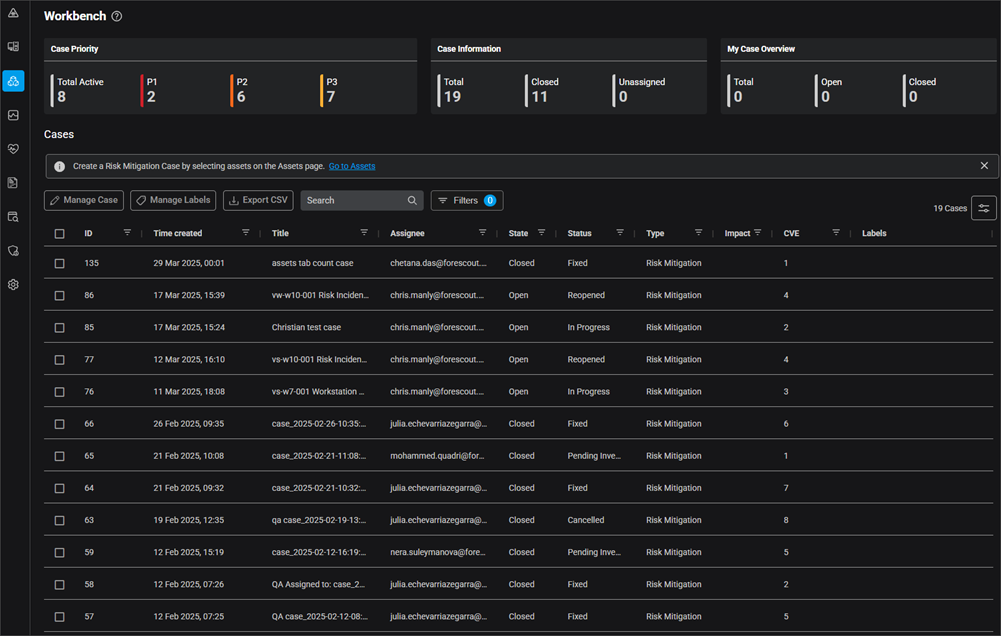
Sort, filter, and customize Workbench columns
The Case list provides the following summary information about each case, which can be sorted and filtered by column. The following columns are selected and displayed by default.
| Column | Description (if necessary) |
|---|---|
| ID | |
| Time Created | |
| Title | |
| Assignee | |
| State | The current state of the case:
|
| Status | The current status of the case. |
| Type | The current case type:
|
| Risk Severity | The current priority or severity of the risk involved with the case. |
| Impact | Any associated impacts specified for the case. |
| IP Address | Any associated IP addresses for the case. |
| CVE | The number of associated vulnerabilities for the case. |
| Labels | Any associated labels for the case. |
You can reorder the position of table columns in the case list by dragging-and-dropping the column headers to the desired order.
Additionally, you can click the Customize Columns button to tailor your Workbench view by adding or removing columns. Click Apply to save the filter and have it persist across your logged in sessions. You can also reset your columns to the default visibility by clicking Restore to default. The following columns are included by default and cannot be removed:
- ID
- State
- Status
Click Export as CSV to export information for selected cases. The CSV file will include your chosen columns (if customized).
Manage cases
To manage a case, select one case from the list and click Manage Case. This will load the Manage Case configuration window so you can adjust any of the fields that were configured when the Case was created. Clicking a case on list the loads its Workbench Case Details.
Use labels with cases
The Workbench provides comprehensive label management for all case types, allowing you to tag cases using custom labels for easier filtering, triaging, and reporting.
To manage and assign labels to cases:
- You can access labels from two locations:
- The Workbench table and selecting one or more Cases, then click Manage Labels; or
- The Case Details page by opening a case and selecting Manage Case > Manage Labels.
- The Actions drop-down provides the following label functions:
- Add New: Assigns a new label to the selected case.
- Replace All: Replaces all of the case's labels with your selections from the Label drop-down.
- Find and Remove: Searches for and removes from the case your selections from the Label drop-down.
- Remove All: Removes all labels from the case.
- Select the desired labels in the Labels drop-down menu. You can select multiple labels for your case(s).
- Click Save.