Set Up an appliance with the Forescout eyeSight Initial Setup Wizard
When you log in to the Forescout Console for the first time, the Initial Setup wizard appears.
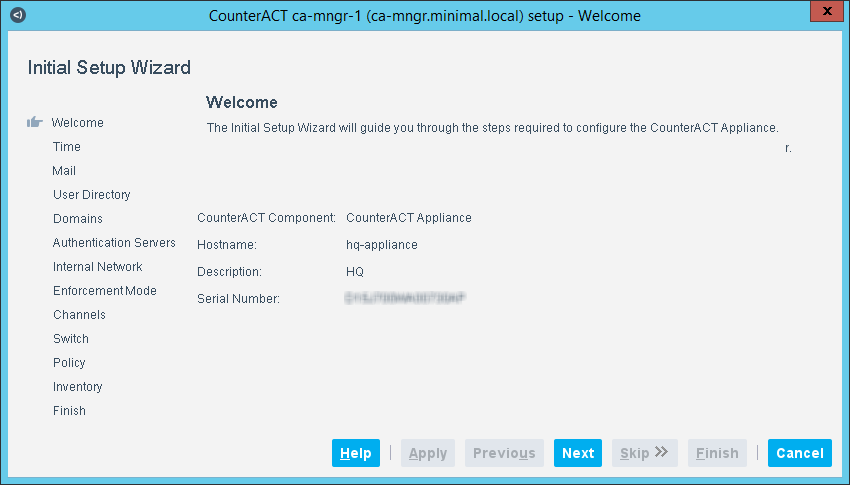
Forescout eyeSight Initial Setup Wizard - Welcome
The Welcome pane is the first pane in the Initial Setup Wizard for an eyeSight component.
The Welcome pane displays the eyeSight component to which you logged in, as well as information you defined during the installation in the Data Center. More Appliance information can be viewed in the Forescout Options window.
Select Next to start the Initial Setup Wizard.
Forescout eyeSight Initial Setup Wizard - License (Virtual Systems Only, Per-Appliance Licensing Mode)
The License pane of the Initial Setup Wizard appears only for a virtual system operating in Per-Appliance Licensing
The virtual license feature is designed to meet the needs of users working in Virtual IT environments, including environments that require a proxy server. These features ensure that such users are working with authorized, secure, and protected licenses.
In the License pane, you can install the virtual demo license provided by your Forescout representative by email. This license is valid for 30 days from the time it was generated by the Forescout representative. When you install the license, the license expiration date is indicated. You must request and install a permanent license before this period expires. See Virtual Licenses for details.
You will be contacted via email regarding the license expiration date and any license violations. In addition, license alerts, violations, status and troubleshooting information can be accessed from the Appliance, Details pane. See View License Alerts for details.
Virtual licenses are authenticated daily by the Forescout License Server (at https://license2.forescout.com). Licenses that cannot be authenticated for a month are revoked and significant Forescout functionality stops. See Virtual Licenses for information about working with the License Server.
When working with the initial demo license, you can select any license file for any device, provided that a specific license file is installed on one device only. (If you use the same license file for more than one device, the license may be revoked. Moreover, you will be unable to add an Appliance to the Enterprise Manager if an Appliance with the same license is already connected.) You can rename the file if required. Extended demo licenses and permanent licenses are intended for a specific device.
Forescout eyeSight Initial Setup Wizard - Time
Use the Time pane of the Initial Setup Wizard for time zone NTP time server synchronization settings.
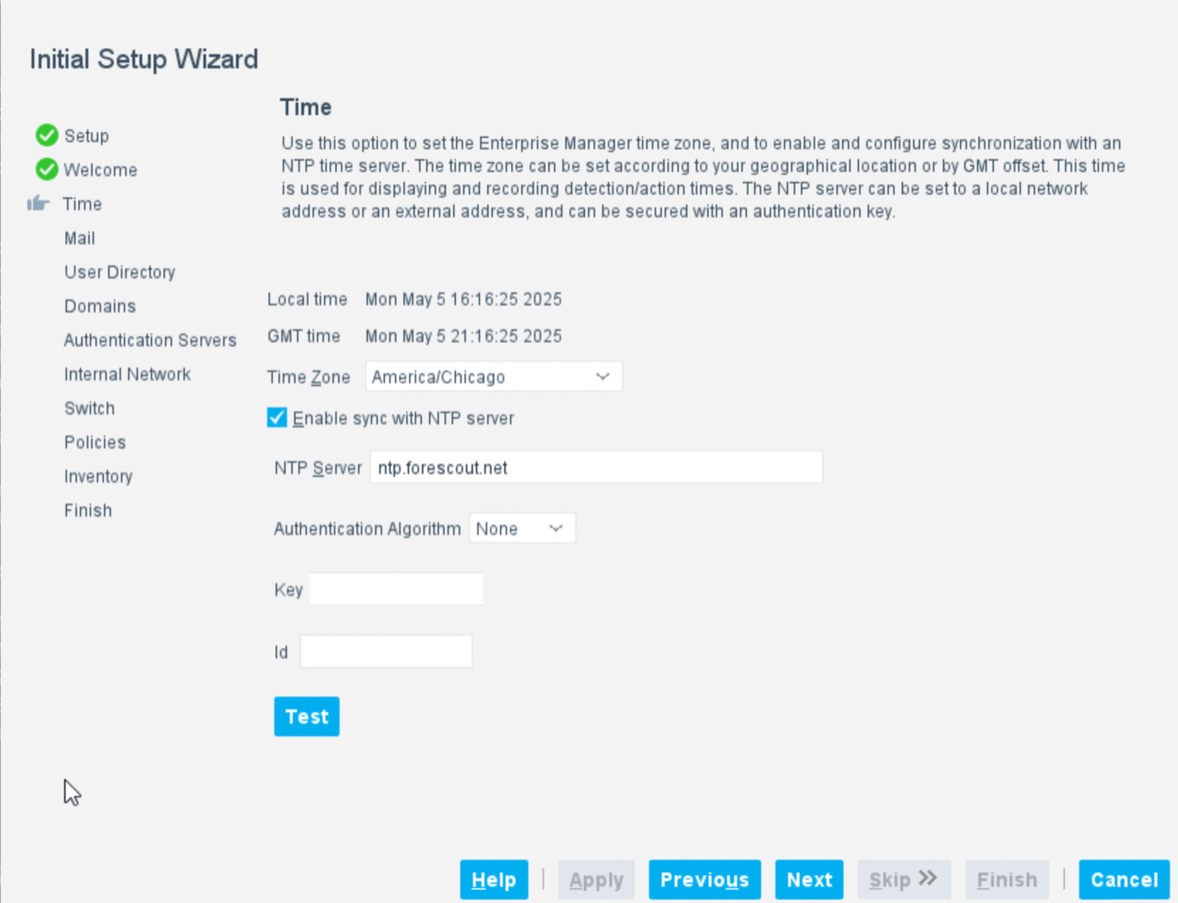
ntp.forescout.net).Forescout eyeSight Initial Setup Wizard - Mail
In the Mail pane, you can define the Mail relay and the Admin email addresses.
eyeSight generates email messages for:
- Policy and Threat Protection alerts
- Scheduled reports
- Critical system operation alerts
- Licensing alerts
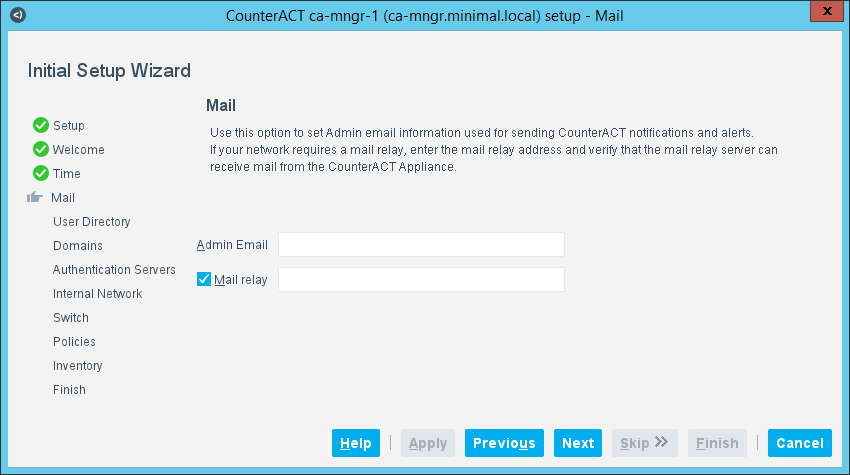 Admin Email (Required)Forescout Administrator email address(es) or another address that should receive the email alerts / notifications, which are generated by eyeSight alerts. Separate multiple addresses by commas, spaces or semicolons.Example 1: [email protected]Example 2: [email protected], [email protected]You can sign these emails using a digital certificate, as specified by the Secure / Multipurpose Internet Mail Extensions (S / MIME) standard. See Signing Emails with an S/MIME Certificate for details.Mail RelayThe internal mail relay IP address to allow delivery of email alerts if SMTP traffic (port 25) is not allowed from the Forescout platform to the Internet.This must be the fully qualified host name. For example, mail-relay.example.com.If you enter an incorrect address you will not receive alerts.
You can update all the options that the eyeSight SMTP mail server uses to send its email alerts/notifications, including using SMTP user name / password authentication with TLS (secure communication). See Managing Email Notifications.
Forescout eyeSight Initial Setup Wizard - User Directory
Use the User Directory pane of the Initial Setup Wizard to define the credentials for a User Directory server.
You can define User Directory credentials to validate network authentication and resolve user details. For example, endpoint User Directory display name, department name, or email address.
You can define various types of User Directory servers. The following user directory and authentication servers are supported:
- Microsoft Active Directory
- Novell eDirectory
- Oracle Directory
- IBM Lotus Notes
- OpenLDAP Server
- RADIUS
- TACACS
You can work with more than one server type simultaneously. For example, if your organization uses Microsoft Active Directory for retrieving user details and a RADIUS server for verifying authentication, you can configure the plugin to work with both these server types.
You can define additional User Directory servers from the Forescout Console Options window by selecting User Directory, and then selecting Add.
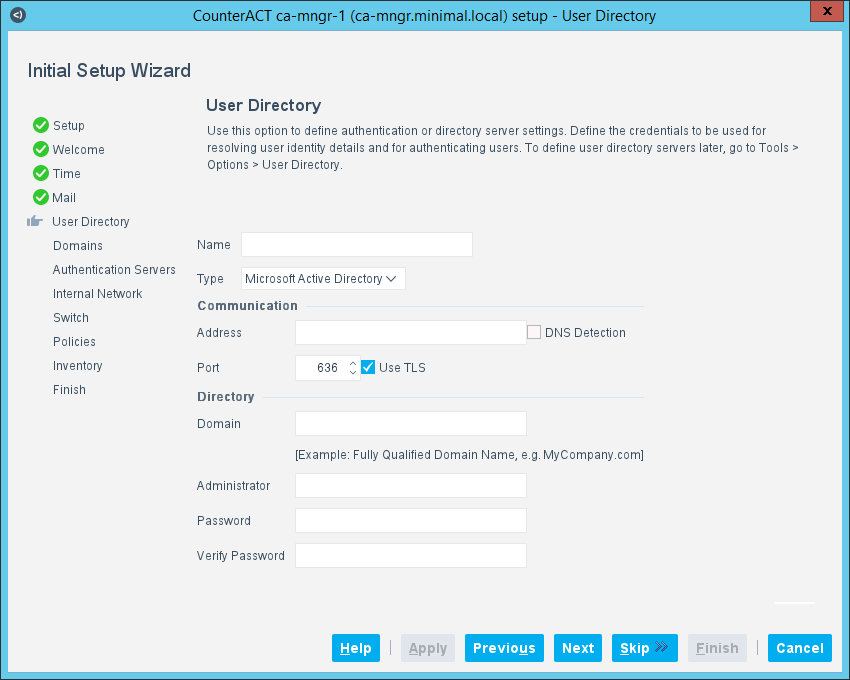
Setup requires a User Directory server that can be queried to validate authentication and obtain details regarding users at detected endpoints. Configure the following settings in the User Directory pane:
After User Directory server setup, you can view and edit the existing User Directory server configuration by selecting in the Console. User details and authentication status are displayed in the Detections pane. For more information about User Directory server setup, refer to the User Directory Plugin Configuration Guide.
Forescout eyeSight Initial Setup Wizard - Domains
Use the Domain Credentials pane of the Initial Setup Wizard to set up network domain credentials that the Appliance uses to perform deep inspection on endpoints.
In the Domains pane, enter the domain information necessary for the Appliance to authenticate with the Domain Controller. Domains should include endpoints that are handled by your policies. You may include several domain entries.
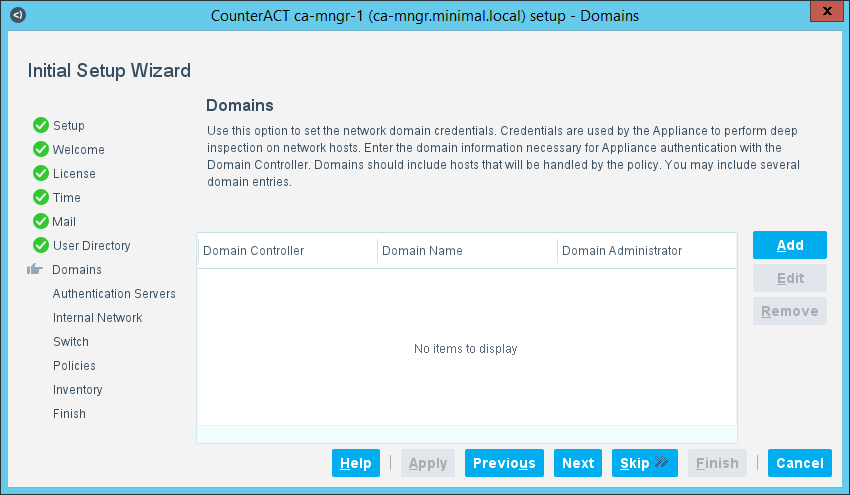
In the Domains pane, select Add, and define the following:
If the verification test fails, you may need to perform troubleshooting tasks. See Remote Access to Endpoints for details.
Forescout eyeSight Initial Setup Wizard - Internal Network
Use the Internal Network pane in the Initial Setup Wizard to define your network segments or IP ranges.
The Internal Network is a set of network segments or IP ranges that defines your network in the eyeSight. When eyeSight detects endpoints with IP addresses within the Internal Network, they are assumed to be in your network.
The Internal Network defines the extent of eyeSight management activity. For example, when a Forescout policy scope is defined as "All IPs," the policy is applied to all IP addresses in the Internal Network. Network segments that are part of your physical network, but are not included in the Internal Network definition, are not managed by Forescout products. In addition, endpoints in the Internal Network must be visible to Forescout Appliances.
The Internal Network is defined in the Console as a set of named IP ranges. Typically, these ranges correspond to logical segments of your network.
Several Forescout tools use these Internal Network segments. For example, you use these segments to assign sectors of your network to Appliances, to define the scope of a policy, and to define the active response range for Threat Protection features.
Segments you define during setup can be fine-tuned to more closely represent the structure of your corporate network, and you can add additional segments later. See Working with Forescout Segments for details.
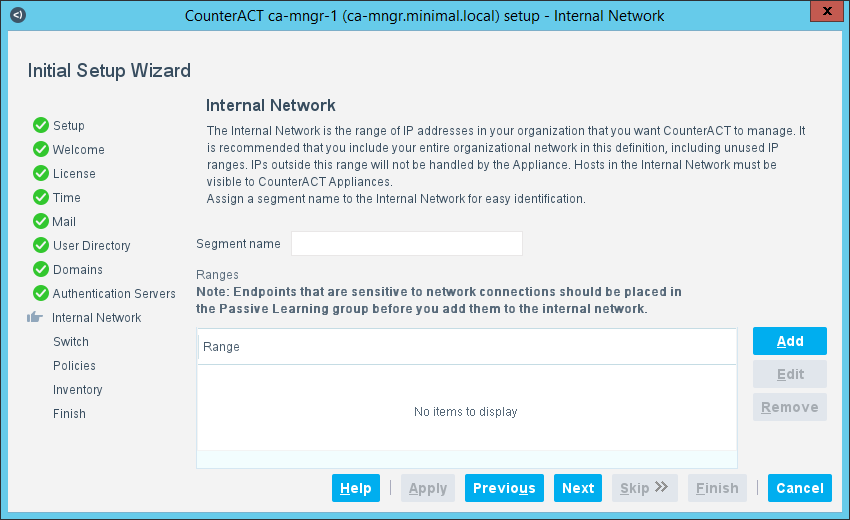
In the Internal Network pane, select Add to define IP ranges or subnets. The Segment name field is mandatory.
Completing interface assignments made in the Data Center
If you change the monitoring interface assignment in the Channels pane, you must go back to the Data Center and readjust the physical interface connections so that they match.
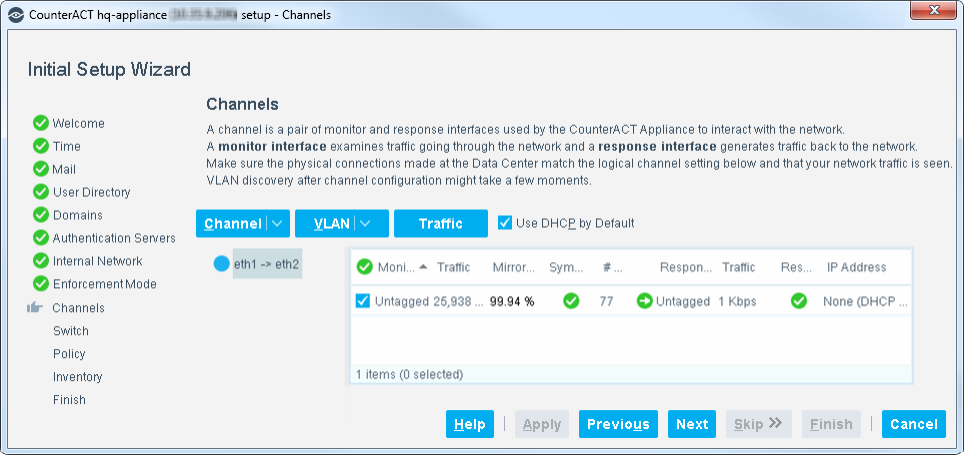
If your network architecture is set up to work with VLANs, the Appliance automatically detects them. These VLANs are listed in the Channels pane.
Status Indicators
An indicator is displayed on the Console status bar if:
- There is a connectivity problem on an enabled VLAN or interface.
- No channels are enabled.
- A new VLAN is discovered by the Appliance.
The Channels pane contains the following options:
Monitor Interface Information
Response Interface Information
Initial Setup Wizard - Switch
Use the Switch pane in the Initial Setup Wizard to configure the switches that the Switch Plugin manages.
For switches managed by the Switch Plugin, use eyeSight switch tools to:
- Track the location of endpoints connected to network switches and retrieve relevant switch information. For example, users can view the switch IP address and switch port to which endpoints are connected.
- Detect new endpoints on the network, by alerting the Forescout eyeSight about port status changes via SNMP traps.
- Assign switch ports to VLANs, allowing you to set up dynamic, role-based VLAN assignment policies or quarantined VLANs.
- Use ACLs to open or close network zones, services, or protocols on specific endpoints at the switch.
- Block endpoints based on IP addresses or MAC addresses.
- Shut down switch ports completely.
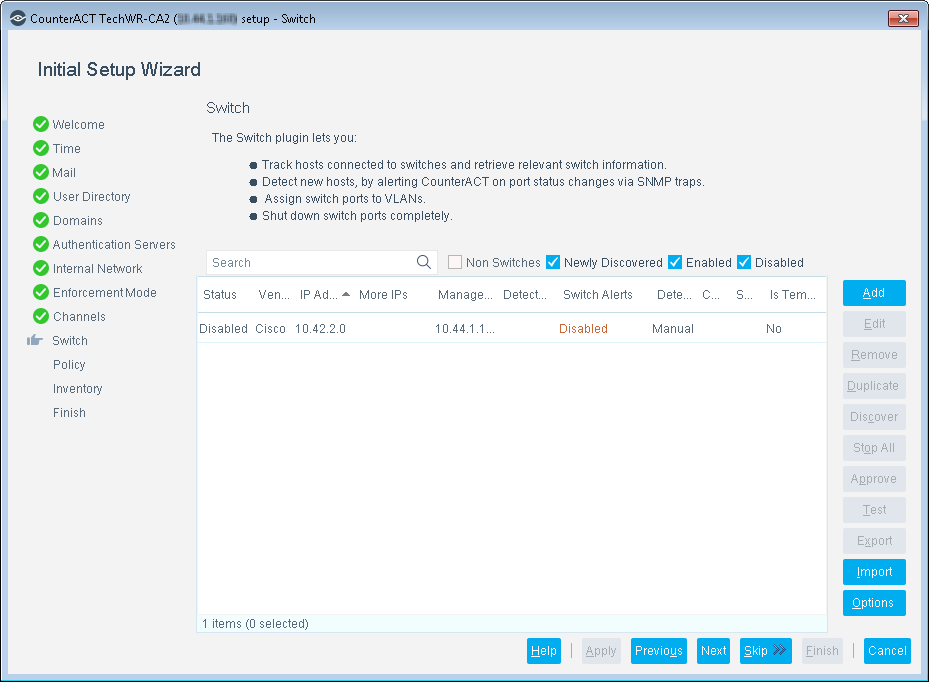
In the Switch pane, you can configure a switch that exists in your network by selecting Add, and completing the Add Switch wizard.
You can configure the switch to add other switches in your network in two ways:
- Auto-discover additional switches: Switches of certain vendors (Cisco, HP, Brocade/Foundry, Enterasys and Nortel) can auto-discover neighboring switches of any of these vendors. Discovered switches inherit basic attributes of the switch that detected them. All permissions and ACL configurations in discovered switches are disabled
- Use the switch configuration as a template for other switches: When an unmanaged switch (that is, a switch that is not managed by the Switch Plugin) sends an SNMP trap and the community string of the unmanaged switch matches the community string of this switch, then all the settings of this switch (except its IP address) are applied to the unmanaged switch. Switches detected in this manner are automatically added in the Console.
You can also add additional switches here, and then select Switch in the Console Options window to edit switch configurations and use additional Switch Plugin features.
Initial Setup Wizard - Policies
Use the Policies pane of the Initial Setup Wizard to classify endpoints into easily manageable groups of network assets and corporate/guest users.
Network asset classification is carried out by a eyeSight Primary Classification policy. Corporate/guest user classification is carried out by a Corporate/Guest Control policy. These policies are created using core policy templates.
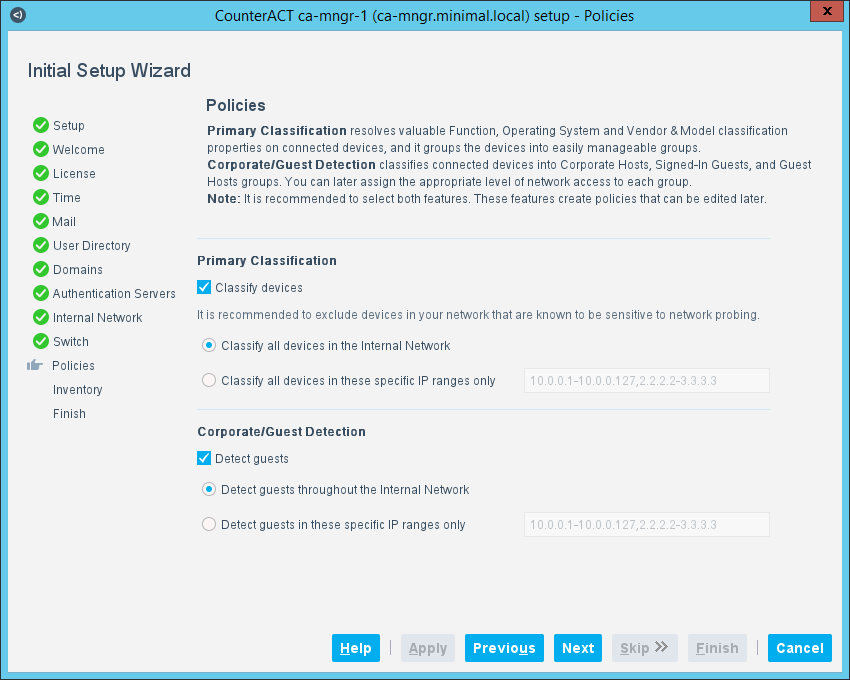
How classification works
A proprietary algorithm is used to compare the properties of endpoints with the properties of pre-defined device classification profiles, each composed of properties and corresponding values. When the classification algorithm detects that certain endpoint properties match a given profile, the endpoint is classified appropriately. For example, the profile defined for Apple iPad considers a set of properties that includes the HTTP banner, the NIC vendor, and Nmap scan results.
Initial Setup Wizard - Inventory
Use the Inventory pane in the Initial Setup Wizard to select the network activities to include in the Asset Inventory. The Asset Inventory presents a live display of network activity in the Console, for example, running processes and services, detected vulnerabilities, open ports, and logged in users.
See also Working with Asset Inventory Detections for details about the inventory, or select Help in this pane.
Use the Asset Inventory to:
- Broaden your view of the network from endpoint-specific to activity-specific.
- View endpoints that have been detected with specific attributes whether or not they are policy-compliant.
- Easily track network activity.
- Incorporate inventory detections into policies. For example, if you discover that network guests are running unauthorized processes on your network, create a policy that detects and stops these processes on guest machines.
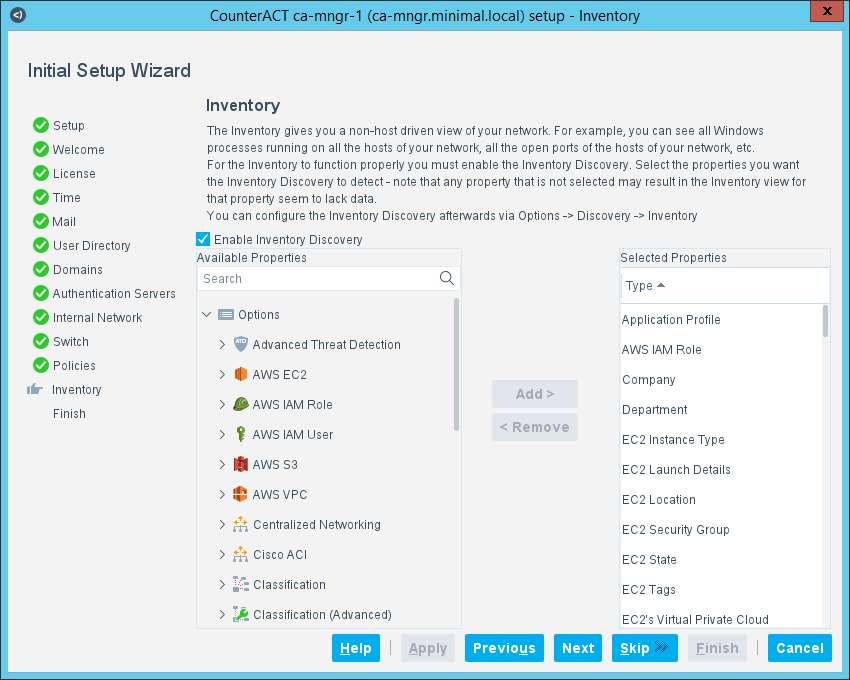 Note: External Devices Connected and Microsoft Vulnerabilities are excluded from the default Inventory rules. Discovery of these properties may generate extensive network traffic. You can include them by updating the Inventory rules. See How the Asset Inventory Is Learned for details.Note: Open ports can also be displayed in the Asset Inventory. This information can be displayed by creating a policy that includes the Open Ports property.
 minute read